TIPS FOR BETTER SEARCHABILITY OF YOUR IMAGES LONG TERM
/by Natalie GunnToday, we don’t give our digital photos much attention once they’re captured on our devices. Instead, we may think about doing something with them only when our phones run out of memory and prompt us to make more room by exporting the photos to other storage devices. Years of this saving go by, and then we find ourselves in the unforgiving sea of unnamed images.
Most people use the default file naming structure for our digital photos like IMG_9876 or JPG-2839. Unfortunately, these unidentifiable names leave many of us drowning in a sea of thousands of photos with no way to locate specific memories.
Using metadata and a consistent file renaming pattern increases the “searchability,” of your images. If you want to be able to quickly find your images, it’s important to start renaming your files now. Otherwise, a decade from now when you’re looking for a photo of your daughter’s first day of school to post on her graduation day, you might be wanting to pull your hair out as you try to locate it.
Consistency is key. Professional photo organizers recommend using a consistent system when it comes to renaming files. This will tie your entire collection together, despite the years that may separate certain pictures. Professional organizers also encourage you to find a system and style of renaming photos that will work best for you. Feel free to make variations on the following suggestion, but whatever naming convention you pick, be consistent.
Who, what, when and where naming approach. This naming system — who, what, when and where — has proved to be the most popular with professionals. For this system, you’ll include people, event, date and location in the file’s name. An easy reference to remember this organizational tool is: YYYY-MM-DD-location-event-who-sequence number. For example, a birthday party for your mom, Susan Smith, in San Francisco on May 23 would look like this: 2017-05-23-san-francisco-birthday-party-mom-susan-smith-JPG-2839.
Once you have named individual files, you can put images in folders. Professional photo organizers have found that the simplest way is to organize by year, and you always have the option to further consolidate by decade. You can also create folders for specific people, such as your kids, or events, such as vacations and sports matches.
Where to find missing details. If you are unable to recall the specifics of a photo, refer to the file’s metadata. All you have to do is right-click the photo and then click on the option that says “get info” or “properties” to view the file’s metadata. This will reveal the date the image was created, which is vital for the above photo renaming system. But you’ll also find the file size, the name of the device that took the image and sometimes even the location.
Why do this now? The work may seem tedious at first, but consider the even more daunting task of trying to find specific image years from now if your photos aren’t organized. This is why photo naming matters! Start renaming your photos, and in the future, your family members will also be able to easily locate photos to share with their loved ones.
Is the idea of organizing your life in photos too daunting? Or maybe you just inherited a storage unit full of your great grandfather’s photo collection? We get it – these treasures can be a real bear to manage. Ask about our professional photo organizing services and we’d be happy to take this project off your hands.
Your story is meant to be shared – and now is the perfect time to do it! Don’t wait until it’s too late to protect those photos of your grandparents, your high school prom and that family vacation to the Grand Canyon.
TIPS FOR MANAGING YOUR LIFE IN PHOTOS
/by Natalie GunnTips for decluttering the thousands of photos on your device.
Our mobile phones have sadly become the final resting place for many of our family memories. Pictures of first days of school, fall adventures, family gatherings at home and other priceless moments in your family history never make it out of our mobile photo albums. The cloud gives us ample space to store thousands of photos – but it the number of images can quickly get out of control if not continually managed. If you take, say, 10 photos a day, every day for a year, that adds up to nearly 4,000 photos left to stagnate on your digital device.
But they don’t need to be lost and unseen. In fact, organizing and clearing your phone of clutter is similar to cleaning out a disorganized closet at home. When you’re cleaning, you will wonder what made you keep certain photos for so long, much like you might wonder why you kept a sweater from high school. No time is better than the present to sort out the mess on your phone.
Let Go of the Photo Clutter
We truly don’t need thousands of photos. If you scroll back in your camera roll, there may very well be duplicate photos, screenshots of recipes you never used or poor-quality photos. Delete these! You want your photos to tell a story about a memory you have and keeping photos that you will never use again only adds to the clutter. And clutter is the last thing you need when it comes to photo organization.
Beginning this process may be intimidating. It’s much like opening the closet you’ve been afraid to open for years, for fear that a ton of junk will tumble out. But you’ve got to let go of the junk to get to the memories that matter most.
Find Time to Delete
Spend time deleting duplicates and non-keepers while in line at the grocery store or set aside time once a week to delete photos. Just like the minimalist mantra, if something doesn’t bring joy, get rid of it.
Organize What’s Left
It takes time and computer know-how to begin the organization of your digital files, and this should also be an enjoyable process because you get to reminisce on past moments. Once you’ve sifted through which photos to keep and which photos to toss, you can begin placing the photos in folders or albums, either separated by year or by an event. This is exactly the process you might use when you are organizing your messy closet. Put winter items in one box, summer in another, and so forth.
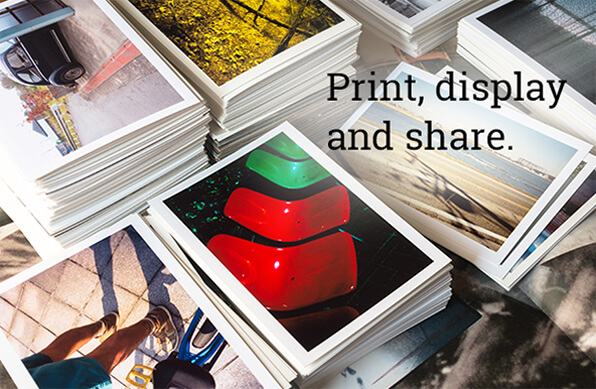
Print them. Display them. Share them.
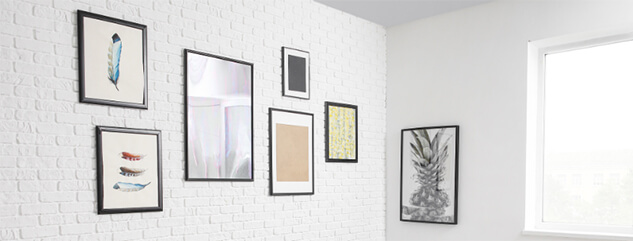
Next, you’ll want to get your photos off your phone and have some type of physical output made. I recommend printing your favorites and making copies for every family member who is part of the story. Of course, you can also create photo books, framed wall galleries and keepsake gifts.
6 Steps For Organizing Your Shoebox of Photos
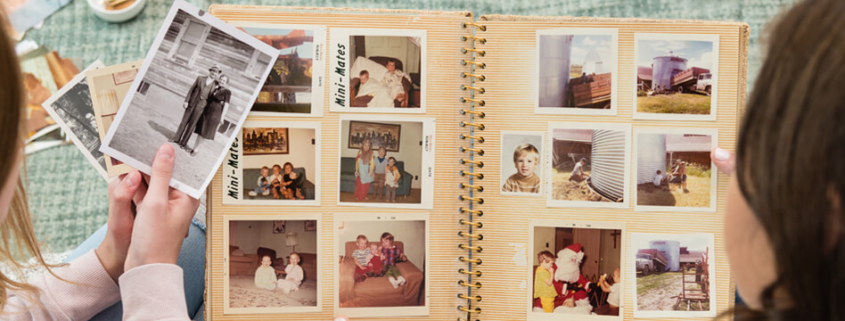
/by Natalie GunnWe all have those lonely shoeboxes of photos and negatives that weigh on our mind every time we open our closet doors. Tackling the contents of those boxes can seem daunting at best and insurmountable at worst. But don’t despair. Here are six tips that can help you sort through your photos and give yourself some organizational peace of mind.
1. Don’t be afraid of the trash bag. That family trip to the Grand Canyon was amazing, but do you really need a hundred photos of the Grand Canyon itself? The answer is no. Those multiple scenery shots, while beautiful, don’t tell the story any better than just one can. My general rule is to eliminate 80 percent of the photos in a box, keeping the other 20 percent for albums. Don’t worry, the Grand Canyon will be around for a long time. I promise that no one will forget what it looks like.
2. Organize by theme.A lot of people think they need to organize their photos chronologically. For some, this method works very well. For others, however, this is a daunting and overwhelming task. It’s often easier — and more effective — to organize by theme. Organizing by theme makes it much simpler to pull together an album. Themes are also easier to identify than dates. While you may not be sure which year that Christmas photo was taken, you definitely know that it’s Christmas.
3. Pace yourself. As hard as it is, you need to strike a fine balance between lingering too long on precious memories and pushing yourself to go too fast. For the former, give yourself two seconds per photo — and only two seconds — to reminisce before deciding where that photo belongs.
Also, set a timer for one to three hours, and be sure to give yourself time to recuperate between sorting sessions.
4. Create a family timeline. Preparing a photo timeline aids in the sorting process as you begin to tackle your collection. I suggest creating a chronological list of events that will help you as you begin uncovering photos, letters, cards and newspapers from the past. By placing them along a single timeline, you’ll start to get a more comprehensive view of your life, even if you don’t know exact dates. A guesstimate will do and will keep you moving forward.
Your timeline can be as simple as drawing a horizontal line across the middle of a piece of paper and adding vertical lines to mark and label events. As you look at the entire collection of photos, determine the oldest photo and the most recent one. This is the time span you’ll plot on your line. Once you have these major markers in place, you can begin to jot other moments or milestones in between.
5. Store your photos safely. Once your photos have been sorted, it’s imperative that you store them correctly. This means putting them somewhere with average temperatures and low humidity — no attics or basements. They should also be stored in containers designed specifically for photo archiving. One reliable source for these is Archival Methods. It offers a variety of acid-free boxes that will preserve your precious memories for decades to come.
6.Get ready to be emotional. The gift of photography is being able to look back on our lives and reflect on the good and the bad, the beautiful and the ugly. The story your photographs tell is one of joy and love, loss and heartache. Ultimately, going through your photos can be a journey of healing. Allow yourself to feel these emotions. It can be extremely helpful to journal how you’re feeling during the process and, if possible, connect with friends and family to discuss the wave of emotions you’re riding.
Organizing your shoebox of photos can feel like an impossible task, but don’t lose sight of the fact that this is important and meaningful work. You are the keeper of your family’s memories and the teller of its stories.
Bio: Cathi Nelson, author of Photo Organizing Made Easy; Going from Overwhelmed to Overjoyed, is the founder of APPO (Association of Personal Photo Organizers), a membership organization dedicated to helping thousands of entrepreneurs from around the globe build successful photo preservation and organizing businesses.
Tips for Hilariously Happy Holiday Cards
/by Natalie GunnIf you’re planning to send holiday cards, and, ahem, we know you are, be sure to mind your p’s and q’s. A little humor never hurt either. Especially this time of year. Follow these suggestions to make yours the most well-received greeting cards of the year.
When should I send them?
Don’t be like the store who puts holiday decor on sale before Halloween. Send your cards during the first month of December for arrival two to three weeks before Christmas.
Formal or funny?
We always say, “You be yule.” Not sure what it means exactly but if your family get-togethers tend to go Grizwald, we think your cards should too! Posed portraits are passe. Snapshots are super! Just remember that your senders’ list probably contains some formal acquaintances who may not know the crazy side of you… yet.
Mind Your Merry Manners
Even if your message goes offbeat, it’s still a good idea to envelop it in the sincerity of formality.
Address them to “Mr. & Mrs.” unless they’re very close friends. If you’re unsure of a woman’s marital status, always use Ms. and be sure to include professional titles for doctors and public servants. When you know it, use a person’s birth name rather than a nickname, like James instead of Jim.
To address a card to everyone, use “The Johnson Family.” Spell out street names rather than abbreviating them.
Return The Favor
Don’t forget to add your return address so they can send one back. Yours should include at least your family name above the address.
Now or Never, or Maybe Later
The holidays are hectic. If you miss missed your window this year, don’t panic. New Years Cards are the new fashionably late and with fresh card styles that aren’t bound to traditional holiday themes, they really are fashionable! Send them for arrival in the first half of January and you’re golden!
Whatever you do, don’t skip it! This could be the only time you send a heartfelt message and photo to these important people. And don’t forget the little elves who are here to help. That’s us!
Five Ways To Fauxlaroid
/by Natalie GunnFive Ways To Fauxlaroid
Mine was a Polaroid® One-Step. A black plastic behemoth with a shutter button the size of my whole thumb. And that was the smallest part. Things were big in the ‘90s but this whole thing was obtuse compared to the refined 35mm cameras it sat next to. And while 35mm counterparts were capturing sleek, wide images with a 3:2 ratio that could yield beautiful color prints of all sizes, this thing would spit out one squarish frame of mud. But then came the magic. The print would develop in my hand. Checkmate. That’s how Polaroid cemented itself in our hearts as instantly as it captured each emotion. For all the science behind the technology, it was the magic that we’d come to love.
If you didn’t go for Polaroid back in the day, don’t worry. You can rediscover the format or recreate the iconic look easily.
First, there’s The Impossible Project, a movement to resurrect the Polaroid film factory and sell refurbished Polaroid cameras to an enamored following. You can buy Impossible® film and cameras manufactured to near-original specs right now.
There’s also a new original Polaroid from Polaroid Originals® (these company names are uncanny). The OneStep2® is a slightly more compact, an updated version of the iconic OneStep that still uses the familiar 600-type film. No frills, all retro.
And, while not Polaroids by design, the Fujifilm® Instax® line has successfully cornered the instant market since its introduction a decade ago. There are original, square, and mini formats, a complete line of cameras, and an instant printer to liberate images from your device.
Speaking of devices, did you know there’s a Polaroid smartphone? It doesn’t make polaroid pictures so we won’t get into it. But for any device, there is, of course, an app for that. The Polaroid® Instant Mobile App lets you snap or import a pic and apply the timeless Polaroid format complete with captions scribbled on the border. Available for Android, iOS, and Mac. Unlike actual Polaroids, you can share as many copies as you’d like.
Of course, for the trillions upon trillions of digital images captured via other means that will never know the familiar frame of the beloved Polaroid, we call upon the magic of Photoshop. Easy as:
- Open image
- Crop to 3×3”
- Resize canvas to 3.5×3.5” (center).
- Resize canvas again to 3.5×4” (add to bottom).
Actual dimensions, for you purists: https://support.polaroidoriginals.com/hc/en-us/articles/115012363647-Polaroid-Originals-photo-dimensions
A batch action for, for you power users, (credit: Maximilian Janicke via Deviant Art): https://rawimage.deviantart.com/art/Polaroid-GENERATOR-V2-118854065
Finally, for the absolute easiest way to fauxlaroid any image, order polaroid-style prints from any device online or in-store with us! That’s right, any selfie or mobile snapshot can be output with the same iconic white border just like the real thing.
#instantlove #instantstyle #polaroid #fauxlaroid
Action Photography Tips + Tricks by Photo Instructor/ Digital Imaging Guru
/by Natalie GunnAction Photography Tips + Tricks by Photo Instructor/ Digital Imaging Guru
Article © 2018 by Jenna Caplette, with the expert assistance of Kathy Eyster, a member of the instructional staff at Bozeman’s F-11 Photo & The Print Refinery™.
Here’s the deal with photographing action: if you don’t get it right, you can’t fix it later with Photoshop. Out of focus is out of focus. Use these practical tips to get great action photos even with a point and shoot camera from photo instructor and digital imaging guru Kathy Eyster:
• Choose the “sports” mode or a similar setting that uses a fast shutter speed.
• Shoot in “continuous” shooting or “burst” mode. You’ll get as many frames as your camera can take for as long as you hold the button down, increasing your odds of getting a great picture. Your flash usually won’t fire in these modes, so this may not stop action in low-light situations.
• Photographing the action closest to you will give you the best shots.
• Use a technique called “focus lock.” Imagine you’re at a race and you want to photograph your sister crossing the finish line. The finish line isn’t going to move. Set your camera up and frame the shot that you want to get using the finish line as your point of focus. Hold the shutter button halfway down and then shoot just as your sister crosses the line. This allows the camera to pre-focus
on the spot where the action will be giving you a crisp, clear image.
• Anticipate the action and start shooting ahead of time.
• Try a technique called “panning.” Follow your subject with your camera, keeping the subject in the same spot in the frame. Your subject should be traveling left or right or vice-versa, rather than moving toward you or away from you. When a cross-country skier glides by, focus on the skier and press the shutter in continuous shooting mode. The skier will be sharp and the background blurry, expressing speed.
A large part of action photography is timing, which requires observation and strategy. The more you know about the pattern of activity, the better your images will be. However, it’s difficult to both watch an event and photograph it. If you decide to photograph, prepare to take a lot of pictures. Pack a spare battery and an extra memory card so you don’t run out of power or space on your memory card before the event ends. You’ll take hundreds of pictures and you’ll get a few you like. Toss the bad images, celebrate the good ones. Print. Repeat.
Be sure to visit Eyster’s helpful website for more tips you can use every day: Kathy Eyster Blog
How to Create a Killer Slideshow Your Family Will Enjoy
/by Natalie GunnGather your family, grab some popcorn and have a box of tissues ready. Creating a beautiful, impactful slideshow is a fun project for anyone who loves photography! But deciding which photos to include, and how to sequence pictures for maximum impact, can be a time-consuming challenge. As you choose and arrange photos for a slideshow, imagine you’re writing a story. But instead of using words to tell the story, you’re using pictures to tell your story. Look through your photo library and try to find the following eight types of pictures. As you make your selections, ask yourself, “does each of these photos work together to tell the story? So now let’s dive in and learn how to create a slideshow that will make your family cry – tears of joy!
- Portraits: these pictures introduce key characters in the story. For example, be sure you include a portrait of each key family member in your album or slideshow. When your family traveled to New York City for a holiday gathering, did grandma and grandpa come along too? Then, by all means, include snapshots of their grinning faces watching the kiddos ice skate at Rockefeller Center!
- Scene Setters: these are typically wide-angle, sweeping shots that give viewers a sense of place. For example, did you include a dramatic shot of your family trip to Niagra Falls?
- Interaction: these photos capture the close relationships between your loved ones. Select pictures of family members sharing fun or memorable experiences. Don’t just choose posed pictures of family members standing in front of big landmarks. (Those tend to be pretty boring!) Try to find a series of candid photos of the family hanging out, adventuring and laughing! The more natural the shot, the more impact it has in your slideshow.
- Honest Emotion: these types of photos showcase unique personalities and traits. Often, these are shots of family members reacting to something happening. Did Uncle Bob tell a hilarious joke at dinner that made your mom LOL? If you captured your mom’s expression, make sure to include it in your slideshow! It will inspire wonderful reactions from your family when they watch the finished slideshow.
- People without People: This is my favorite type of photo to include in slideshows! These are photos of objects or details that show viewers something about the characters in the story. For example, pictures of your grandma’s childhood home help add context and emotion to your slideshow. Find a few fun ones to enhance your slideshow!
- Transitions: these photos show characters going from one “chapter” of the story to the next. For example, you could include a snapshot of your family boating through the Hawaiian islands. Try to pick photos that show your group moving from one place to another! It helps your slideshow make sense chronologically.
- Decisive Moment or “Hero Shot:” These pictures are often the most dramatic ones in your slideshow. It’s a type of photo that makes everyone smile because it sums up your entire vacation/trip/experience. For example, this could be a snapshot of everyone gathering around your parents cheering them on at their 50th wedding anniversary.
- Closing Shot: A closing shot is a picture that conveys the end of the story. For example, this type of photo could show your family members walking down a path at the end of a hike, or seaside sunset at the end of a fun day.
Pro tip: consider dividing photos up into chapters or themes. This will make the task of sequencing much more intuitive. As you group photos together, the best sequence for maximum emotional impact will become clear. Just make sure to bring a box of Kleenex when you debut your slideshow to your family!
Now that you’ve learned the eight types of photos to include in an album or slideshow, you’re ready to tackle creating a slideshow for your family.
Managing Digital Images on Memory Cards and Files
/by Natalie GunnArticle © 2018 by Jenna Caplette, with tips from the staff of
F-11 Photo & The Print Refinery™
You’ve captured some great digital images. Now what? Here are the next steps you should take:
First, save the images from your camera to your hard drive. Its best to use a card reader to download pictures from your camera’s memory card. If you have to use the camera itself, be sure the batteries are new, fully charged, or use an AC adapter. Then, save your images to your computer’s hard drive or other media. Don’t put a card with edited images back into the camera.
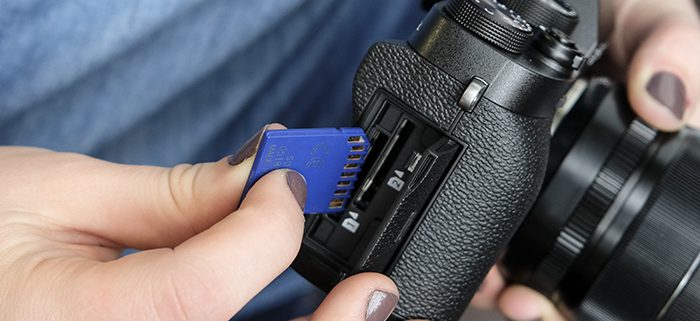
To extend the life of the memory card you just popped back in to your camera, here are some basic tips:
• Always turn the camera off before inserting or removing the card.
• Never remove a card from the camera or turn the camera off while it’s accessing the images.
• Never force a card into a slot.
• Protect your card from dirt, static and moisture. There are some great, safe, storage options available.
• Use only the camera you are shooting with—not the computer or another camera—to format the card after you’ve successfully downloaded and saved the images to your computer. Do format instead of using delete all.
At least twenty percent of digital images that have been taken have been already lost because they weren’t properly saved, backed up and printed. Ideally, you should have three copies of every image you take. One on the computer hard drive where you can access it and use it, one on archival media stored in a dark, dry place, and a third stored far enough away from your home so that in the event of a natural disaster, your images are still safe.
One of the easiest ways to take care of the off-site storage is to use a Cloud service. You can utilize a free photo sharing site like that offered by Bozeman’s F-11 Photo & The Print Refinery™ or something like Drop Box to accomplish the same thing. Make sure you can upload files in their original size, that you can access them when you want to and you can easily download them. Make sure that you keep your contact information up to date, as most services require you to log in from time to time so they know you still want your images.
Choose your best images and have prints made. Don’t wait until you’ve had time to come up with the perfect version. Let yourself enjoy sharing them while your memory of taking the shots is still fresh.
If you don’t use software that helps organize your images for you like Adobe Lightroom or Apple Photos, think through how you’ll look for them. Create a system for naming folders that makes sense to you and that will continue to make sense twenty folders—or twenty years down the line. For a visit to a friend’s ranch from this month, this year, you might name that “ranchvisit2018_02.” When you have a system like this, you’ll be able to find the images you are looking for. If you use discs, label them the same way. Remember to make incremental back ups of everything, including edited and unedited files. Don’t just store them on the hard drive.
To recap these basics: take care of your memory card. Organize your image files on your computer. Download your images and immediately make back ups. If you use discs as part of your backup plan, make sure they are archival quality, not cheapies that will rot. M-disc is currently the most archival product made.
Getting organized can be a challenging process but once you have a system, the task of downloading and editing images becomes far less daunting.
Stuff happens. When it does, having proper back ups and printed images makes all the difference.
Take back your photo collection once an for all!
/by Erin Von HoldtThis is the year you’re going to take back your photo collection
You’re going to conquer those boxes of photos before they fade away forever. You’re ready to future proof your old photo collection and organize your digital image archive, you’ve come to the right place. The right time is now. And we’re here to help (or just do it for you).
Three steps to taming the analog anarchy
1. Reduce
The first step is to weed out what you can’t keep. Remove duplicates, damaged prints, and non-photographic memorabilia. Throw them away. If there are trophies, drawings, newspaper scraps, etc that you’re not ready to throw away, place them in a different box to go through later.
2. Organize
Sort negatives, slides and prints into separate collections. Keep only the negatives that you’re prepared to print or scan. Keep albums that are complete and in good condition. If the inside pages are yellowing or cracking or have excess exposed adhesive, remove the prints and dispose of the empty albums.
Group prints by size and then sort chronologically. If you’ll be storing them again, you want to be able to label boxes or sections by time period. If you’ve saved negatives and slides, group them the same way, in envelopes or negative sleeves.
3. Save
Now is the time to consider scanning prints, slides and negatives that you want to archive or share. A good home scanner costs $200 to $800 and takes 30 to 90 seconds to scan a print, not including set up, cleaning, and post-processing like editing and saving. This is where our batch-scanning services shine. Our experts handle everything for you, often for less that it would cost to purchasing your own scanner. Either way, with the benefit of proper sorting and organization, you can now handle the scanning in manageable chunks. Be sure to save your scanned images in at least two places, one of which is in the cloud, which we’ll discuss next.
Clarifying the cloud
Where to store your digital images
Your digital photos should be organized in the same method as your hardcopies: chronologically. I prefer to name folders like this:
YYYY-MM-DD And Location or Event
They should all be stored on one drive that’s large enough to hold everything AND backed up to the cloud. For all but the most avid photographers, 1TB is adequate. That much storage costs $9.99 a month at any of the top three cloud storage services. Here’s how each one of them handles photos:
- iCloud® already syncs to and from all your apple devices out of the box so it’s easy to entrust with other files too. Once you turn it on, it syncs photos in the background without having to do anything, but you’ll to use Apple Photo as your gateway to get other images into and out of iCloud, especially en-masse. If you use Apple Photos and don’t mind relying on it, stick with iCloud. Otherwise consider one of the next two options.
- Google Drive® was once considered the android alternative to iCloud, but it’s now very friendly across all platforms, including Apple. You get 15GB of free storage and more costs about the same as iCloud. But there’s also Google Photos which wins hands down with free storage of unlimited images up to 16MP each in size. It syncs across all your devices, organizes for you and relies on Google’s great search technology to help find them later. But you can’t organize them into folders yourself. To do that, which you might need to if you’re backing up your already-organized image catalog, you’ll need to use Google Drive. Not a deal-breaker as long as can distinguish between the two and use them as a team.
- Dropbox® is also great across all platforms and it costs the same as iCloud and Google Drive for 1TB of storage. Dropbox lets you organize existing files any way you’d like and respects the folder structure of files you upload en masse. You can access your files adequately in a web browser but it’s really intended to be installed as a synced folder, where a copy of everything stays on your computer, taking up space. Syncing to network or external drives isn’t recommended. Still, if your photo collection is small or this is your first cloud storage, give Dropbox a try (free for 2GB)!
Taken in steps, even the most unwieldy photo collection, can be dealt with pretty painlessly. But if all or any part of this stresses you out, don’t fret. We handle all of this, very well, quite often, for people just like you. We’d love to organize, scan, archive, upload, and unlock a lifetime of memories for you and your family too!
CONTACT US
ASAP Photo & Video + The Print Refinery
3701 Charles Blvd. Suite 100
Greenville, NC 27858
Send us a message →
Call us at 252-321-8888
Text us at: 252-486-4770
Monday–Friday: 10:00am–6:00pm
Saturday: Closed
Closed Sunday

